Thursday, March 14, 2013

Samoa Brownies

This week has been my (Tab) spring break.

I am literally going crazy with nothing to do.

So to solve this problem...I decided to bake today.
I looked at my recipe board on Pinterest... couldn't find anything that I wanted to make...so then I searched for half an hour for the perfect Thursday-afternoon-nothing-better-to-do dessert recipe.
And this is the recipe I found!
Sounded delicious... the pictures looked delicious...sold.

Then I thought, hey while I bake I could also spend some good quality time with the men while they waited for customers...it'd be a win win!


And that's when I realized...who am I kidding? That never happens ever.
:(

First I made the shortcake bottom as the oven was preheating to 350.


I mixed the cut up chunks of cold butter, flour, and powdered sugar.. and to look professional I used the pastry cutter.


And then a few minutes into it decided to use my hands instead.
Nothing better than a skilled pair of hands!


After it was all mixed and crumbly, I pressed it into a parchment paper lined pan (I used our 14x10 bars pan).  


And then let it bake.  The recipe says until light brown... but it never got light brown for me, just kind of puffy.

Then while that was baking, I made the brownie mix.  The recipe calls for fudge brownie mix, plus 1/4 cup of hot fudge.  Sounds like a whole lot of fudge.


After mixing it all up I took the shortbread crust out, poured the brownie mix in, and put it back in for around 26 minutes.

When the brownies were done and cooling, I made the last part - the coconut caramel topping.

I had to toast the coconut which concerned me at first... but it was pretty easy!

Just put the coconut in a pan on low-medium and stir until it's getting brownish.


Then add the caramel sauce and stir until mixed in and warm... and keep it warm until ready to put on the brownies.


Once heated and spread across the top of the brownies, drizzle chocolate on top of it.

Yum!


Shortbread Crust: 
12 Tablespoons unsalted butter (1 1/2 sticks), cold and cut into cubes
3/4 cups powdered sugar
1 1/2 cups all-purpose flour

Brownie Layer:
1 package fudge brownie mix
Water, oil, and eggs called for in the directions on the brownie box
1/4 cup hot fudge, unheated

Coconut Caramel Layer:
3 cups toasted coconut,
1 jar caramel topping (I used a little more than 1 cup)

Chocolate Drizzle:
Chocolate syrup or melted chocolate chips

Preheat oven to 350. Combine all crust ingredients and cut with pastry knife, or mix with mixer until coarse pea-sized lumps form. Press evenly over the bottom of a 9 x 13-inch glass baking dish. Bake until lightly browned.

Meanwhile, prepare brownie batter according to package directions, adding 1/4 cup hot fudge ice cream topping, unheated and straight from the jar. Pour over shortbread crust and bake as directed, until a toothpick comes out nearly clean with only a few crumbs remaining.

When brownies are almost finished, scoop caramel topping into a heavy bottomed saucepan and heat over low until caramel is soft and easy to stir. Add toasted coconut and stir gently until evenly mixed.* If brownies are not quite finished, keep this warm, stirring occasionally. Keeping the coconut caramel mixture warm will help it to spread evenly without tearing brownies apart.

*I toasted the coconut first in the saucepan, and then just added the caramel and mixed it together until it was soft.

Pour coconut caramel mixture over brownies and gently spread evenly over the top. 

Drizzle with chocolate

Cool in refrigerator for easy cutting.
Saturday, March 9, 2013

Layered Red Velvet Cake

After quite a long time.... we are finally back!

With college midterms, hockey games, running half marathons, Florida vacations, baking cupcakes for the big hockey banquet, and just taking care of ourselves, we finally had time to crack down and whip out another blog recipe.

Layered Red Velvet Cake


Layers of cheesecake, red velvet cake, and cream cheese frosting....sounds like a good recipe to have a comeback with.

We decided to make this a square "bar" cake instead of the normal round layered cakes we've done before.  I also think we have layered cakes on the brain lately.  That's all we seem to make.

Since we were short on time (we are still working on the cupcakes for the hockey banquet), we decided to use the red velvet cake box mix instead of a homemade recipe.  Don't judge.  We used 2 boxes, to make 2 square cakes about the size of a 9x13 pan.  


We made the cheesecake in the same size pans and let both the cake and the cheesecake cool down completely in the freezer.


Then came the cream cheese frosting part... my personal favorite, which I guess is always anything dealing with frosting.


Then we trimmed down the cakes, 


put a thin layer of frosting between each layer to  hold it together, 


and then finished off with a thicker layer of frosting on top.  Voila!


Cheesecake:
32 ounces cream cheese, at room temperature
1¼ cups granulated sugar
4 eggs, at room temperature
¾ cup heavy cream
1 tablespoon vanilla extract

Cake:

2 red velvet cake mixes

Ingredients listed for each box mix

Cream Cheese Frosting:
1 cup butter, at room temperature
8 ounces cream cheese, at room temperature
5 cups powdered sugar
2 tablespoons vanilla extract

1. Make the Cheesecake: Preheat oven to 350 degrees F. Butter a 9-inch springform pan and then tightly wrap the outside with heavy duty foil. (I find that double-wrapping helps prevent leaks in a water bath.) Put a pot of water (or a tea kettle) on to boil.*


2. Using an electric mixer, beat together the cream cheese and sugar at medium speed until completely smooth, about 3 minutes. Add the eggs one at a time, beating for a minute or so after each addition, and scraping down the sides of the bowl as needed. Add the heavy cream and vanilla extract, and beat until completely incorporated.


3. Pour the batter into the springform pan; place the springform pan into a larger pan, such as a roasting pan, and pour the boiling water into the larger pan until the water comes about halfway up the side of the springform pan.*


4. Bake until the cheesecake edges are set but the middle still jiggles a bit, about 45 to 55 minutes. Turn the oven off, but leave the cheesecake in the oven with the door closed for 1 hour. At this point, remove the cheesecake from the water bath and place the springform pan on a cooling rack to cool to room temperature. Place the cheesecake in the refrigerator until well-chilled, at least 4 hours or overnight.


*We covered two 9x13 pans with parchment paper instead of using spring form pans, and we did not bake the cheesecakes in a water bath.


5. Make, and bake red velvet cakes as directed, using two 9x13 pans.


6. Make the Frosting: Using an electric mixer with the whisk attachment, whip the butter and cream cheese on high speed for about 5 minutes, scraping down the bowl as necessary. Reduce the speed to low and slowly add the powdered sugar until all is incorporated. Add the vanilla and mix to combine. Increase the speed to medium-high and whip for a few minutes until the frosting is light and fluffy, scraping the bowl as necessary.


7. Assemble the Cheesecake: If needed, level the tops of the red velvet cake layers with a serrated knife or cake leveler so that the tops are level and not domed.  Place one layer of the red velvet cake on your serving plate. Spread a very thin layer of the cream cheese frosting over it (it creates a type of glue so that the layers stick together and don't slide around). Top that with one layer of the cheesecake, and again top with a very thin layer of frosting. Repeat, adding the second red velvet layer, and then placing the second cheesecake layer on top, with a layer of frosting between them. Using the remaining frosting, cover the cake in frosting and decorate as desired. Refrigerate until ready to serve, and refrigerate any leftovers.


Sunday, January 27, 2013

Cherry-Coke Float Cupcakes

Cherry-Coke Float Cupcakes

Tabitha made another recipe, this time completely solo... decorating and all!

What better cupcake to have at The Drive In than this cherry coke float one, besides a root beer float one of course.

(recipe down below)

At first while looking at this recipe it seemed like it was going to take a really long time, but it wasn't that bad at all time wise and was well worth the extra steps!

I preheated the oven to 350.

Then I mixed the flour, sugar, baking soda, and salt together.


Then I beat the egg, buttermilk, and vanilla together.


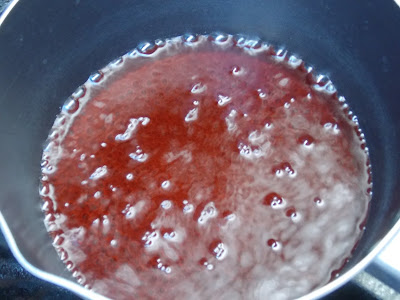
Then in a small saucepan I combined the coke, and the cherry syrup (I used maraschino cherry juice), and let it gently boil for about 5 minutes while stirring every so often.


After the five minutes I threw in the butter and cocoa powder and stirred it all together until the butter was melted.


I poured this mixture into the dry ingredients and mixed well, be careful it's going to be pretty hot.  It should end up looking like this:


After mixed together I added the liquid ingredients (egg mixture), beating until well blended.


After pouring into the greased cupcake pan, I put a cherry in the middle of each cupcake and covered with the batter.


Yummmm!

Then these need to bake for around 20 minutes or until a toothpick comes out clean.

After the cupcakes are cooled, the coke glaze/icing needs to be made.

I mixed the coke and powdered sugar together until it was kind of thick but still runny.  It looks really weird and like you made it wrong, but it will work!


See... weird looking right?

We put wax paper under the cooling trays, and spooned the glaze over the cupcakes making sure they were pretty well covered.


As you can see the glaze dries so it's pretty much see through, but still shiny.


Now it's time for the frosting...

Cherry Buttercream!!


Yum :)

I had a recipe for this but ended up not following it at all and just doing my own thing.

I put a stick of butter in (1/2 cup), and about 2 cups of powdered sugar - give or take.  Then 1 tsp of vanilla, and about 1/4-1/3 cup of grenadine.  The amount of grenadine is pretty much your own choice for how cherryish you want the buttercream to taste like.  Then I blended together until it was pretty fluffy.


Pipe the frosting on top of the glaze, and top with a cherry and straw and you have a great cupcake!


Recipe:

Cupcakes
1 1/2 Cups flour
3/4 Cup sugar
1/2 tsp baking soda
1/4 tsp salt
1 large egg
1/2 Cup buttermilk
2 tsp vanilla
1/2 cup unsalted butter
3 Tbs cocoa powder
3/4 Cup Coca-Cola
1/4 cup marachino cherry syrup
24 marachino cherries

Cola Icing
1 cup Icing sugar
2 tbsp cola

Preheat the oven to 350 F.In a bowl, combine the flour, sugar, baking soda, and salt. Beat the egg, buttermilk, and vanilla in a second bowl. In a saucepan, boil the Coca-Cola, and cherry syrup gently for five minutes. Melt in the butter and cocoa powder. Pour into the dry ingredients, stir well with a wooden spoon, and then add the liquid ingredients, beating until everything is blended. 
Pour into the cupcake pans and push a cherry into the center of each cupcake. Bake for 15 minutes or until a cake tester comes out clean. 
When cool drizzle over the Cola Icing and let dry. Top with cherry buttercream and a cherry.


Happy baking!